Deploying Your First ECS
Quick guide on how to deploy your first ECS on BytePlus
What is BytePlus Elastic Compute Service (ECS)?
Check out BytePlus ECS Documentation
BytePlus Elastic Compute Service or ECS is a virtual machine or instance that you can deploy on BytePlus environment. You can choose the specs for the instance, from their CPU, memory, and volumes. This resources is mapped logically to a physical hardware server in data center. if you have experience on Amazon Web Services (AWS) it’s the same as Elastic Compute Cloud (EC2).
Deploying Your First Instance
Below are the steps for deploying your very first instance inside BytePlus, I will go from accessing the BytePlus site, accessing their console, to starting and accessing the instance that are deployed.
1. Accessing BytePlus Site
You can access the BytePlus Site Here
Before we can start choosing and deploying our instances, we obviously need to access BytePlus first.
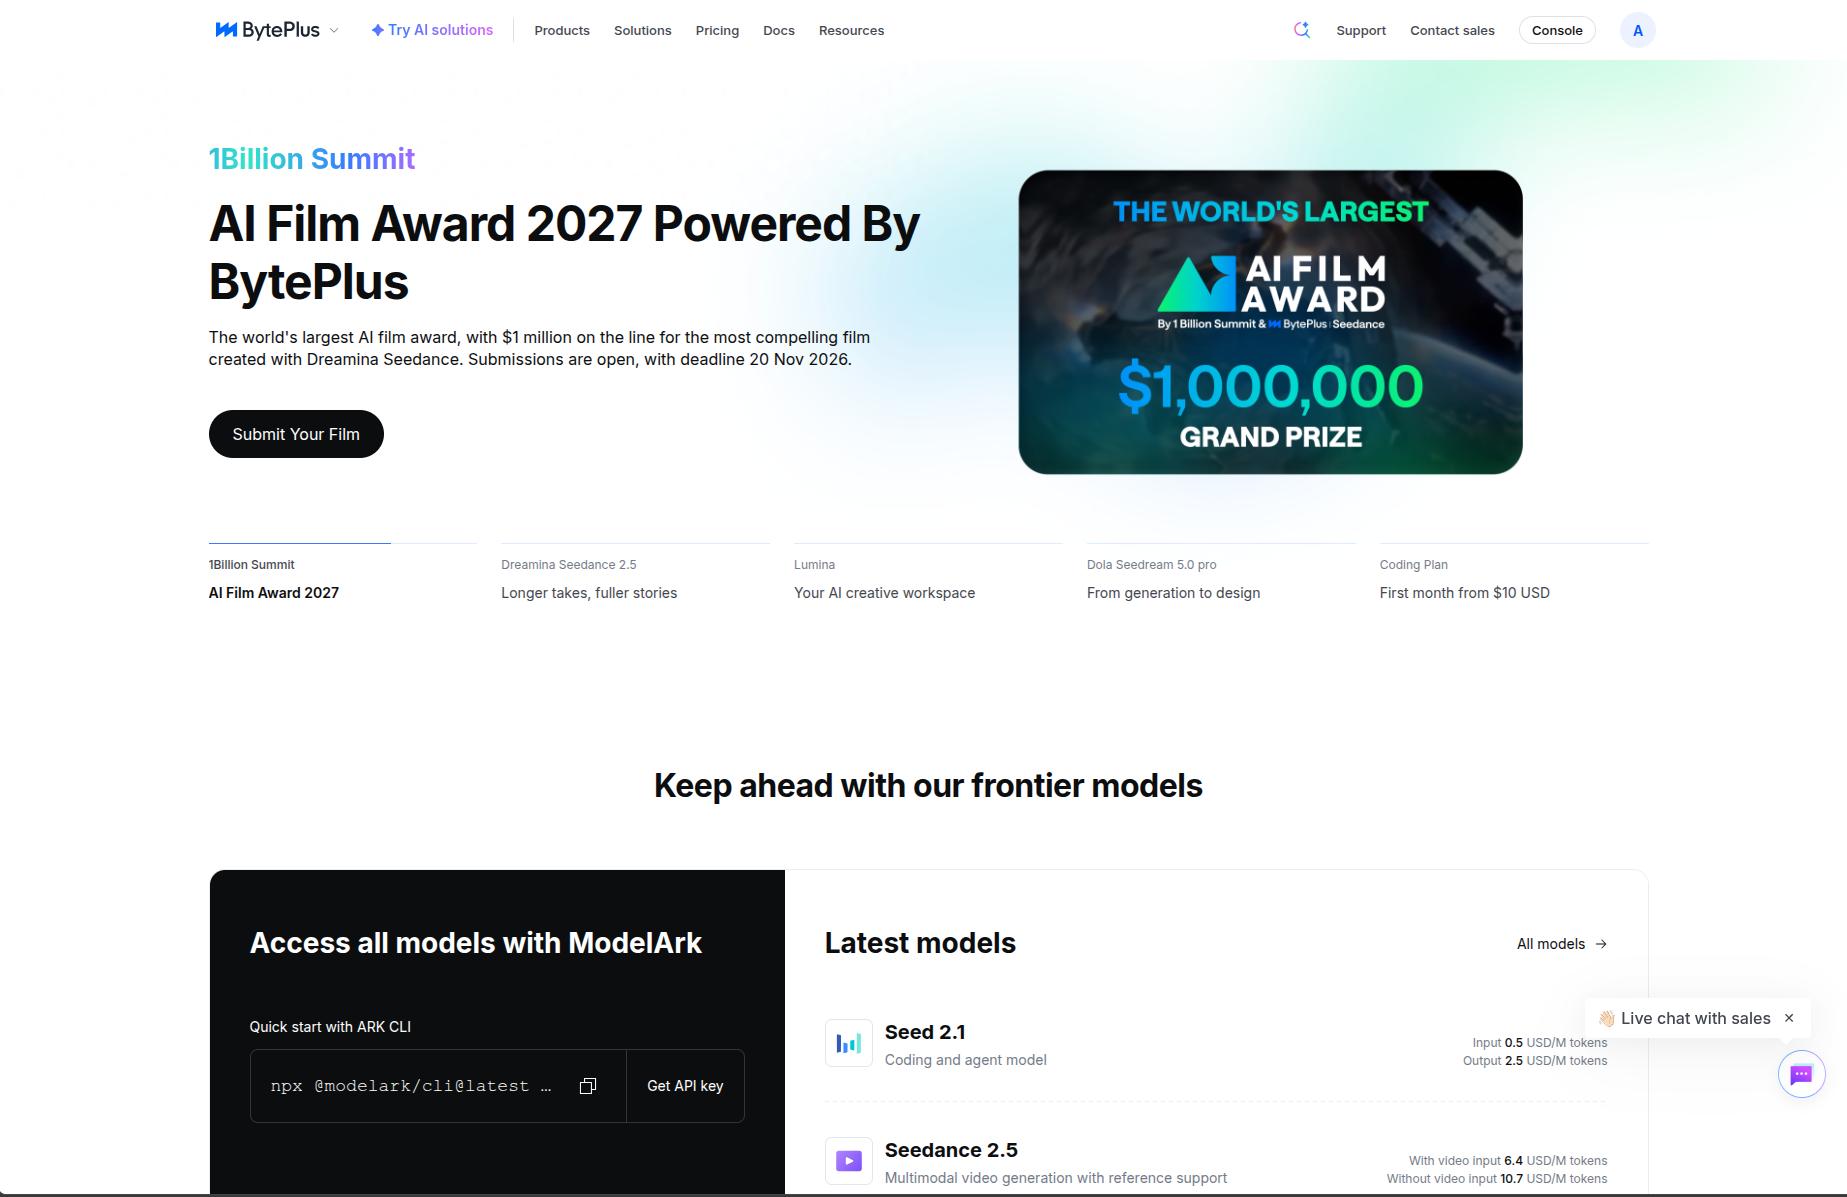 BytePlus Site
2. Accesing BytePlus Console
You can access the BytePlus Console Here
After accesing BytePlus, you can either click on the top right “Console” button, or access it through the subdomain.
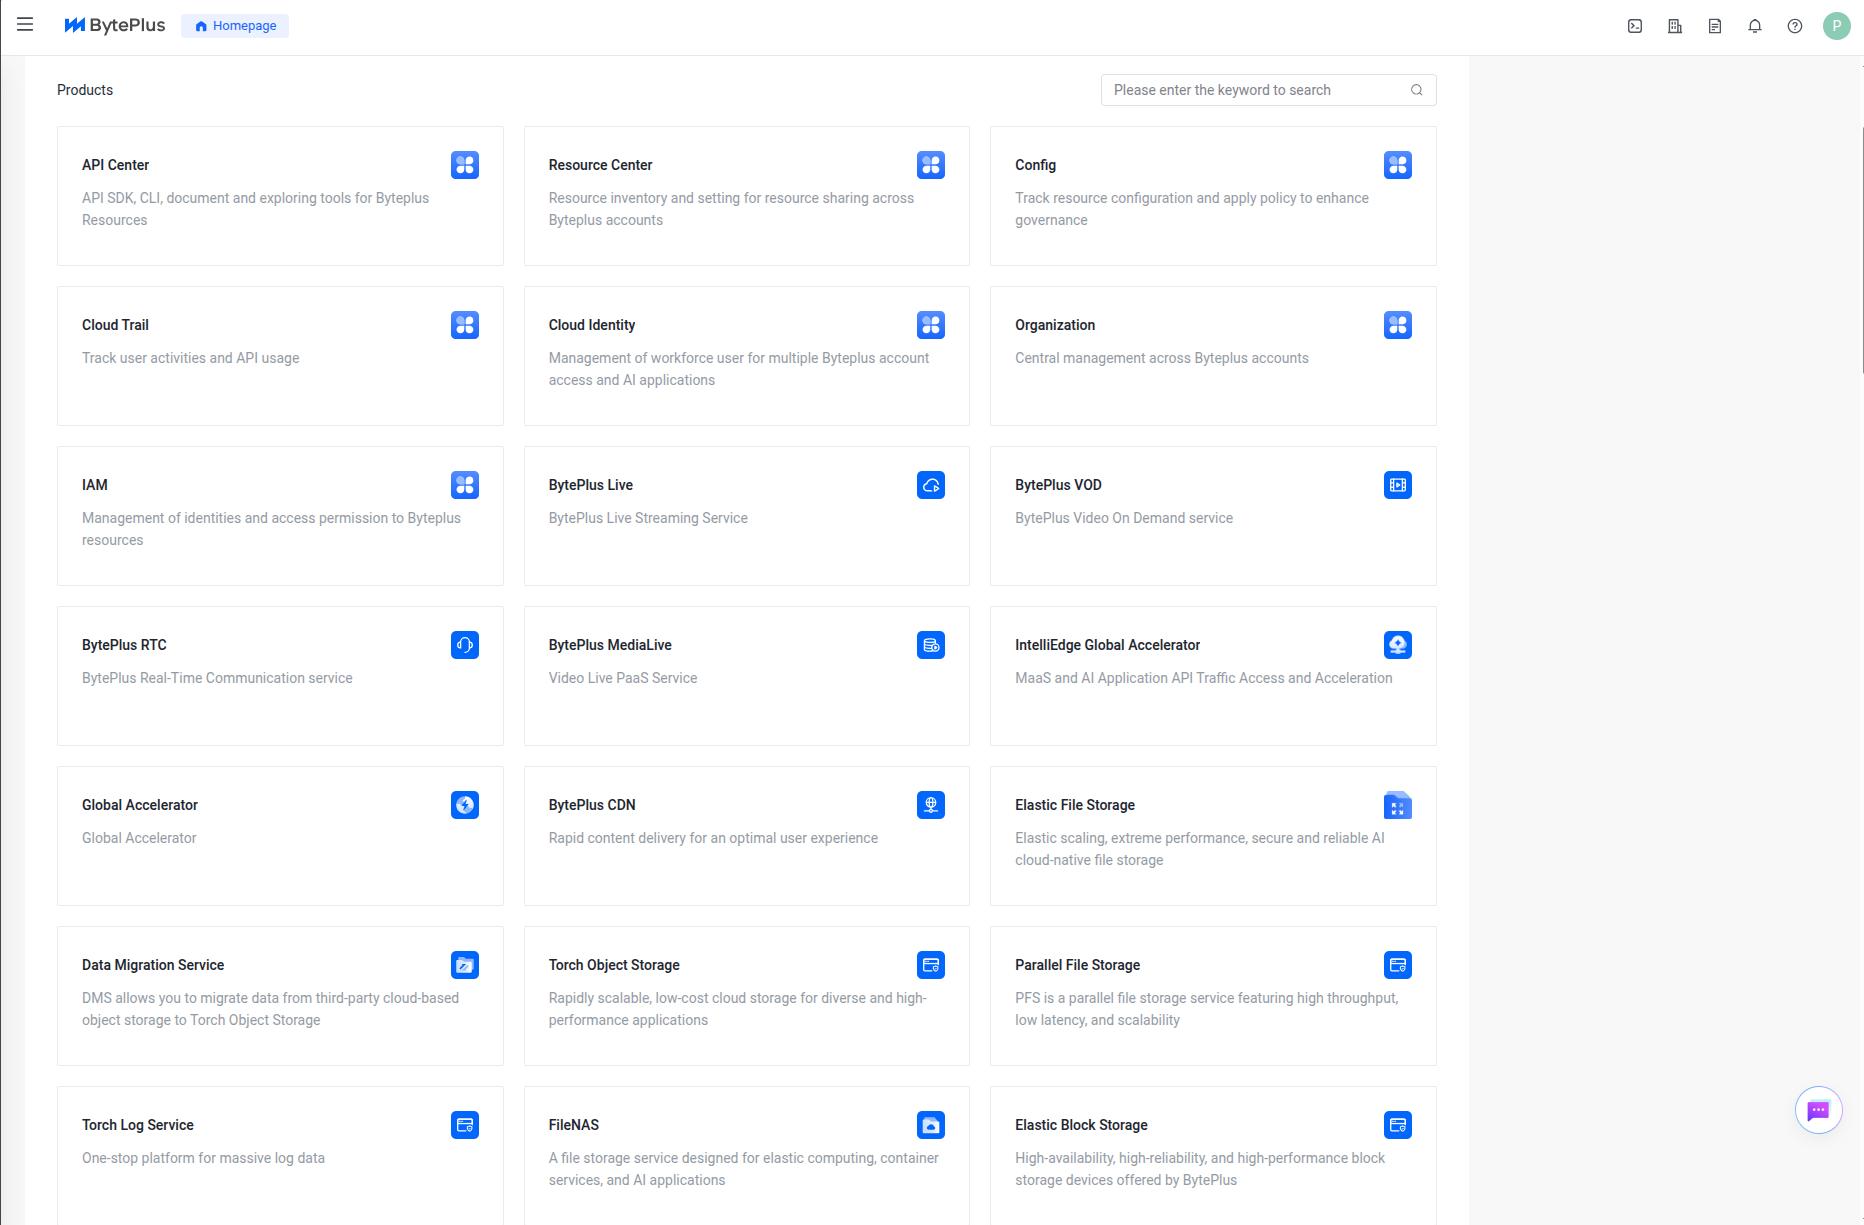 BytePlus Console
3. Find the Service
On your first time accessing the console, you’ll need to search or find the service from all of the provided services in the console. Use the search bar and search for “ECS or elastic” or type the full service name, if you’ve ever visited any services in the console, the service will be listed under a section called “Recently Visited Services”
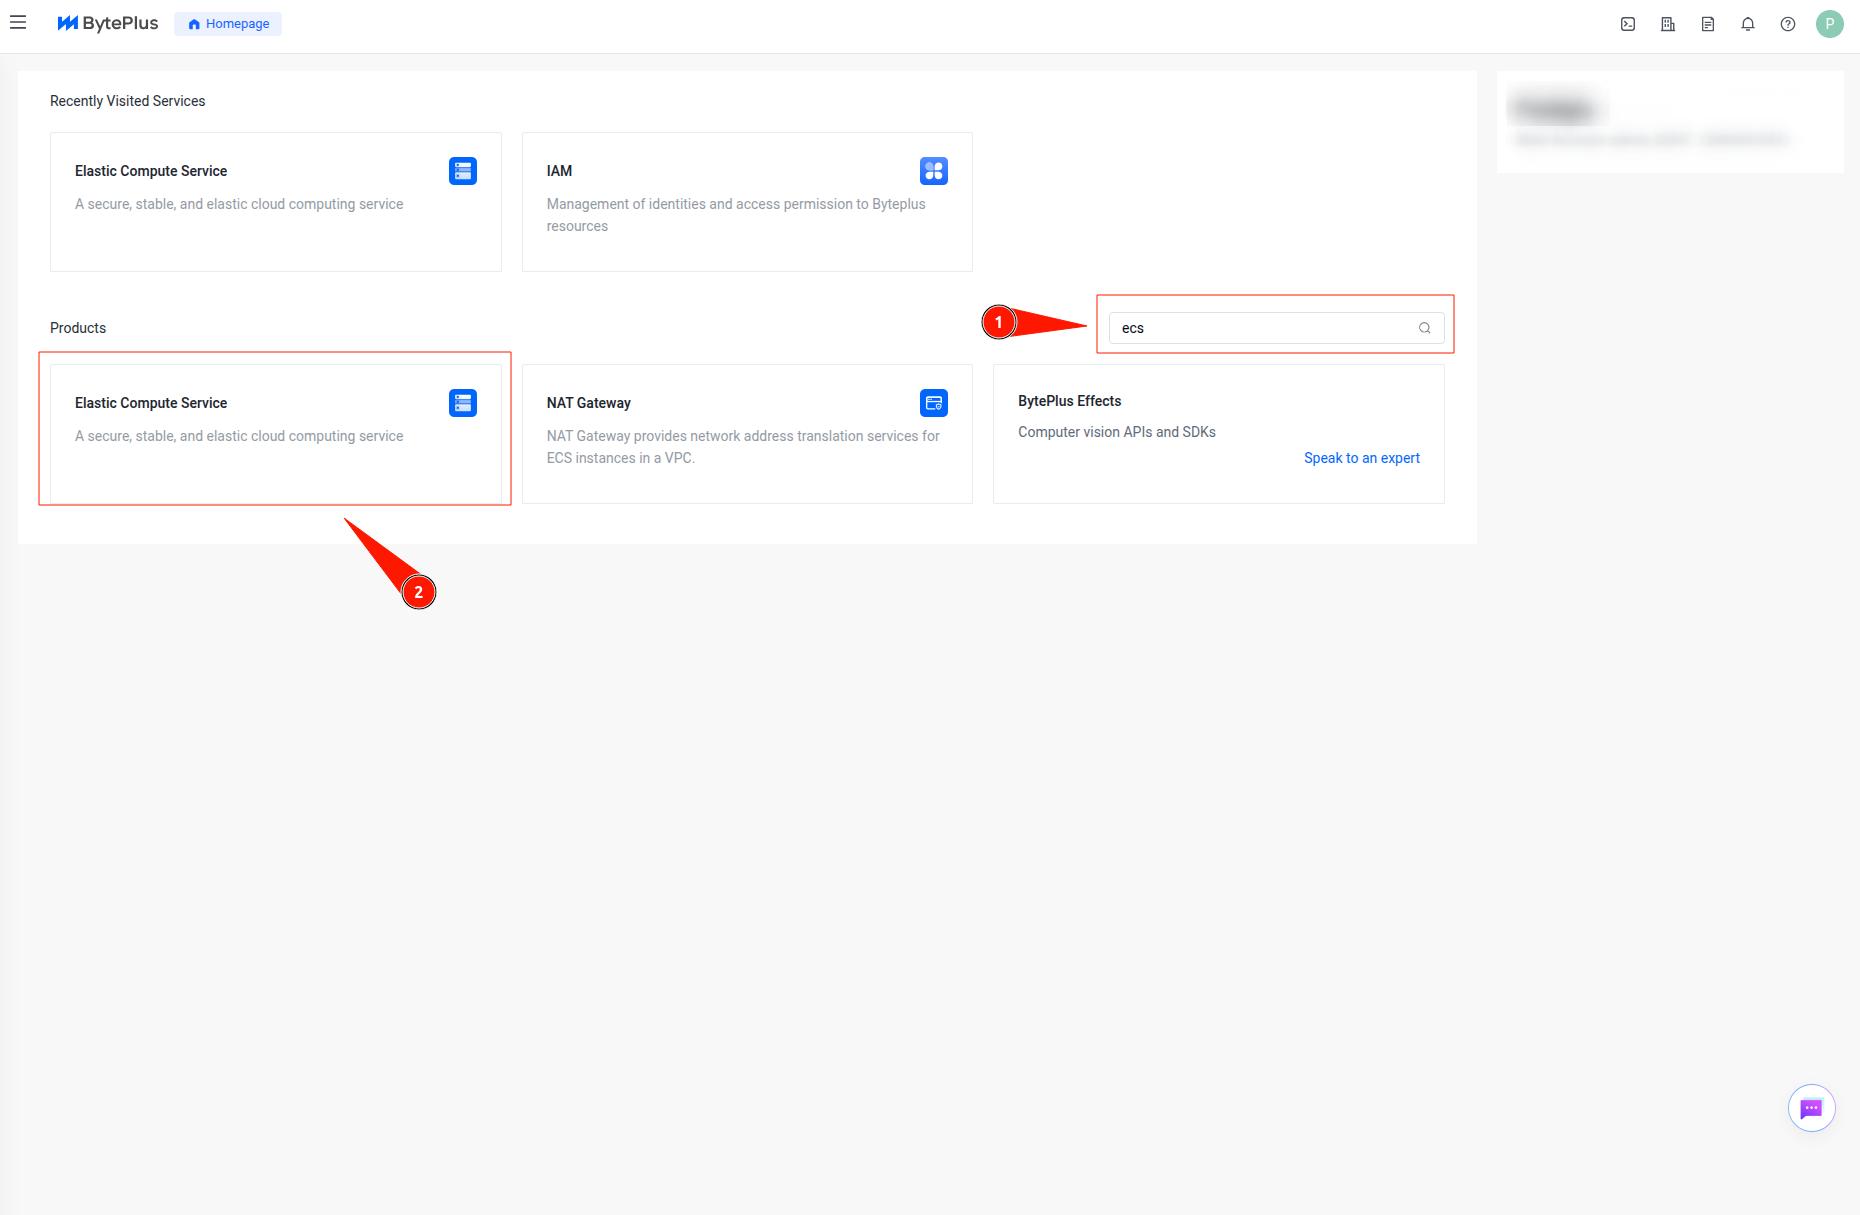 BytePlus Console
4. ECS Dashboard
When the dashboard come up, you’ll be shown the overview dashboard, you can either create your first instance from the button on overview dashboard, or you can create it from the instace sidebar.
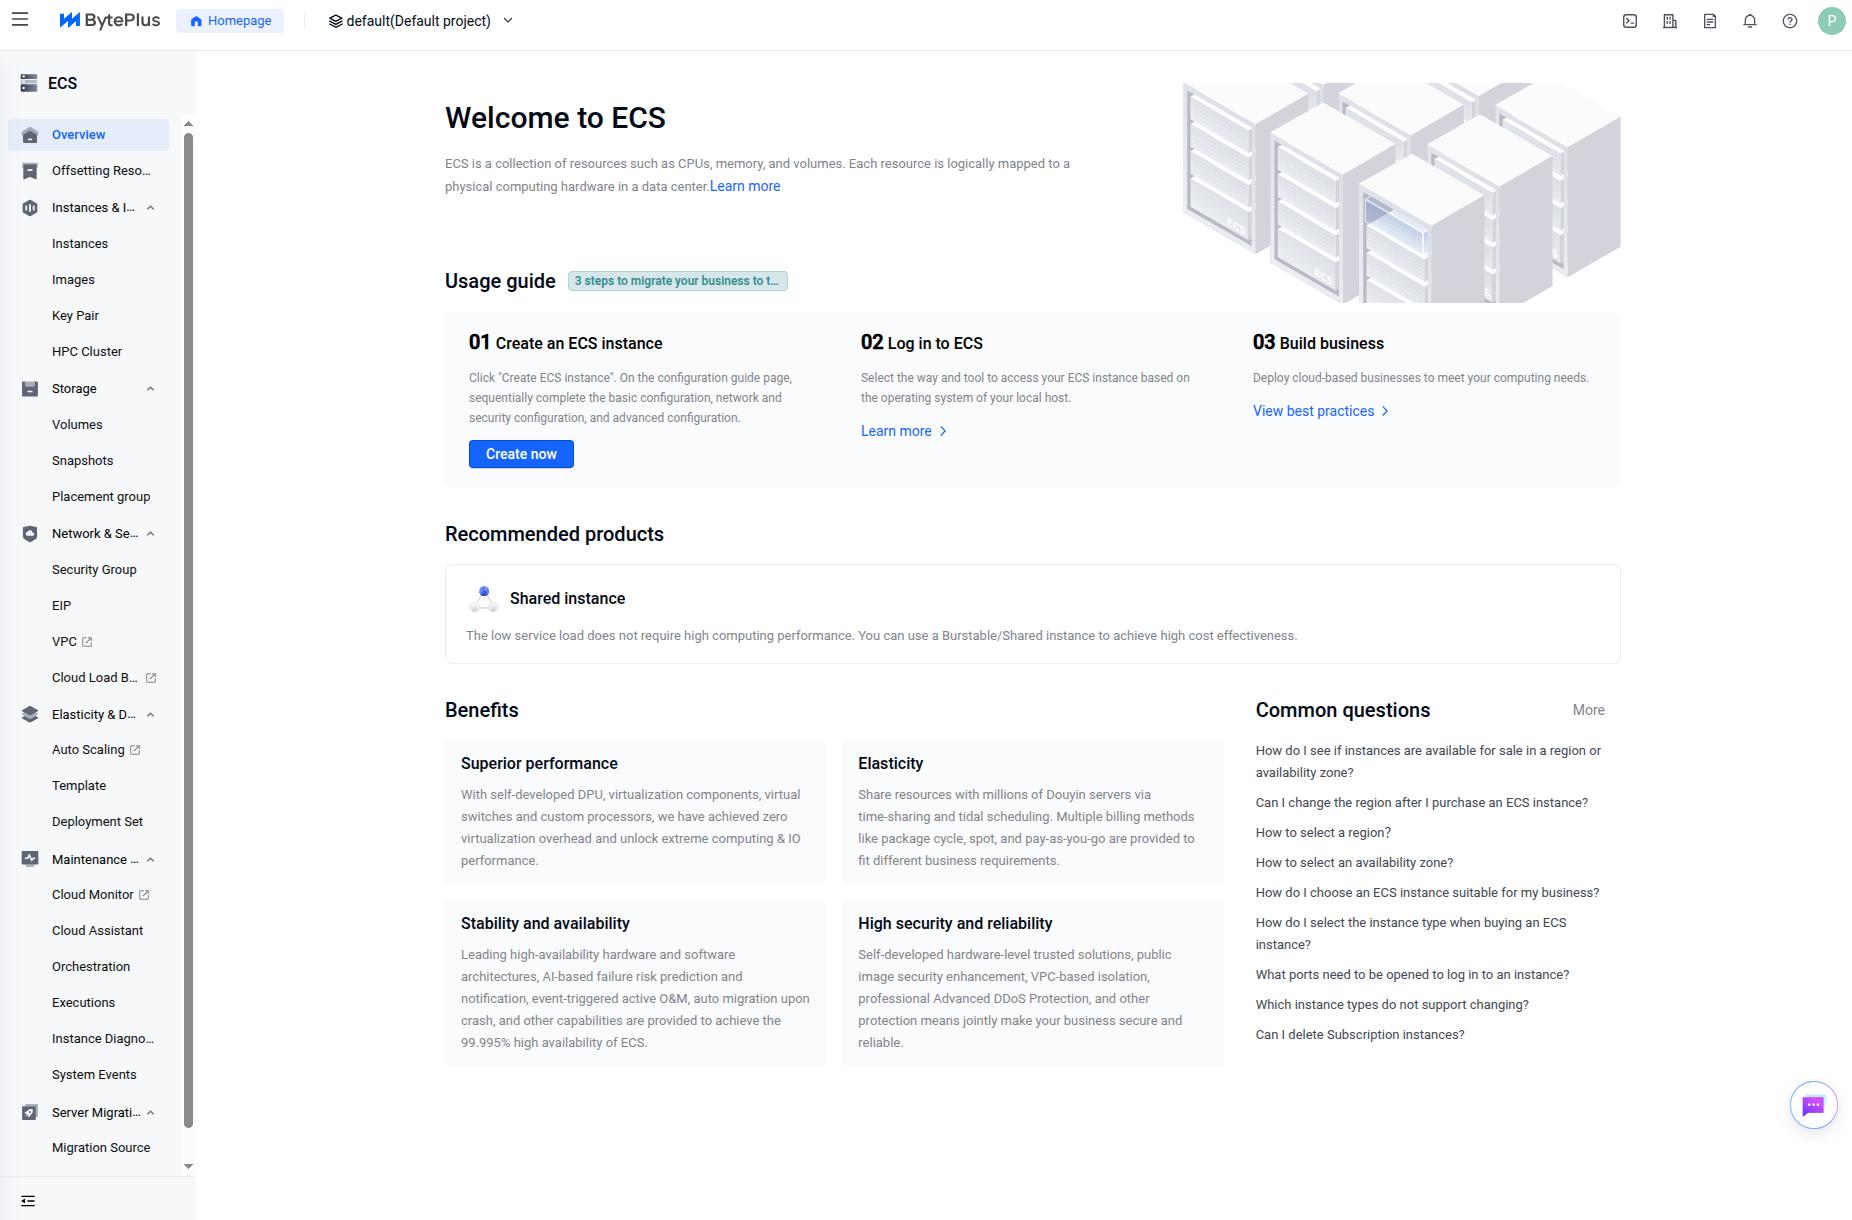 BytePlus ECS Overview Dashboard
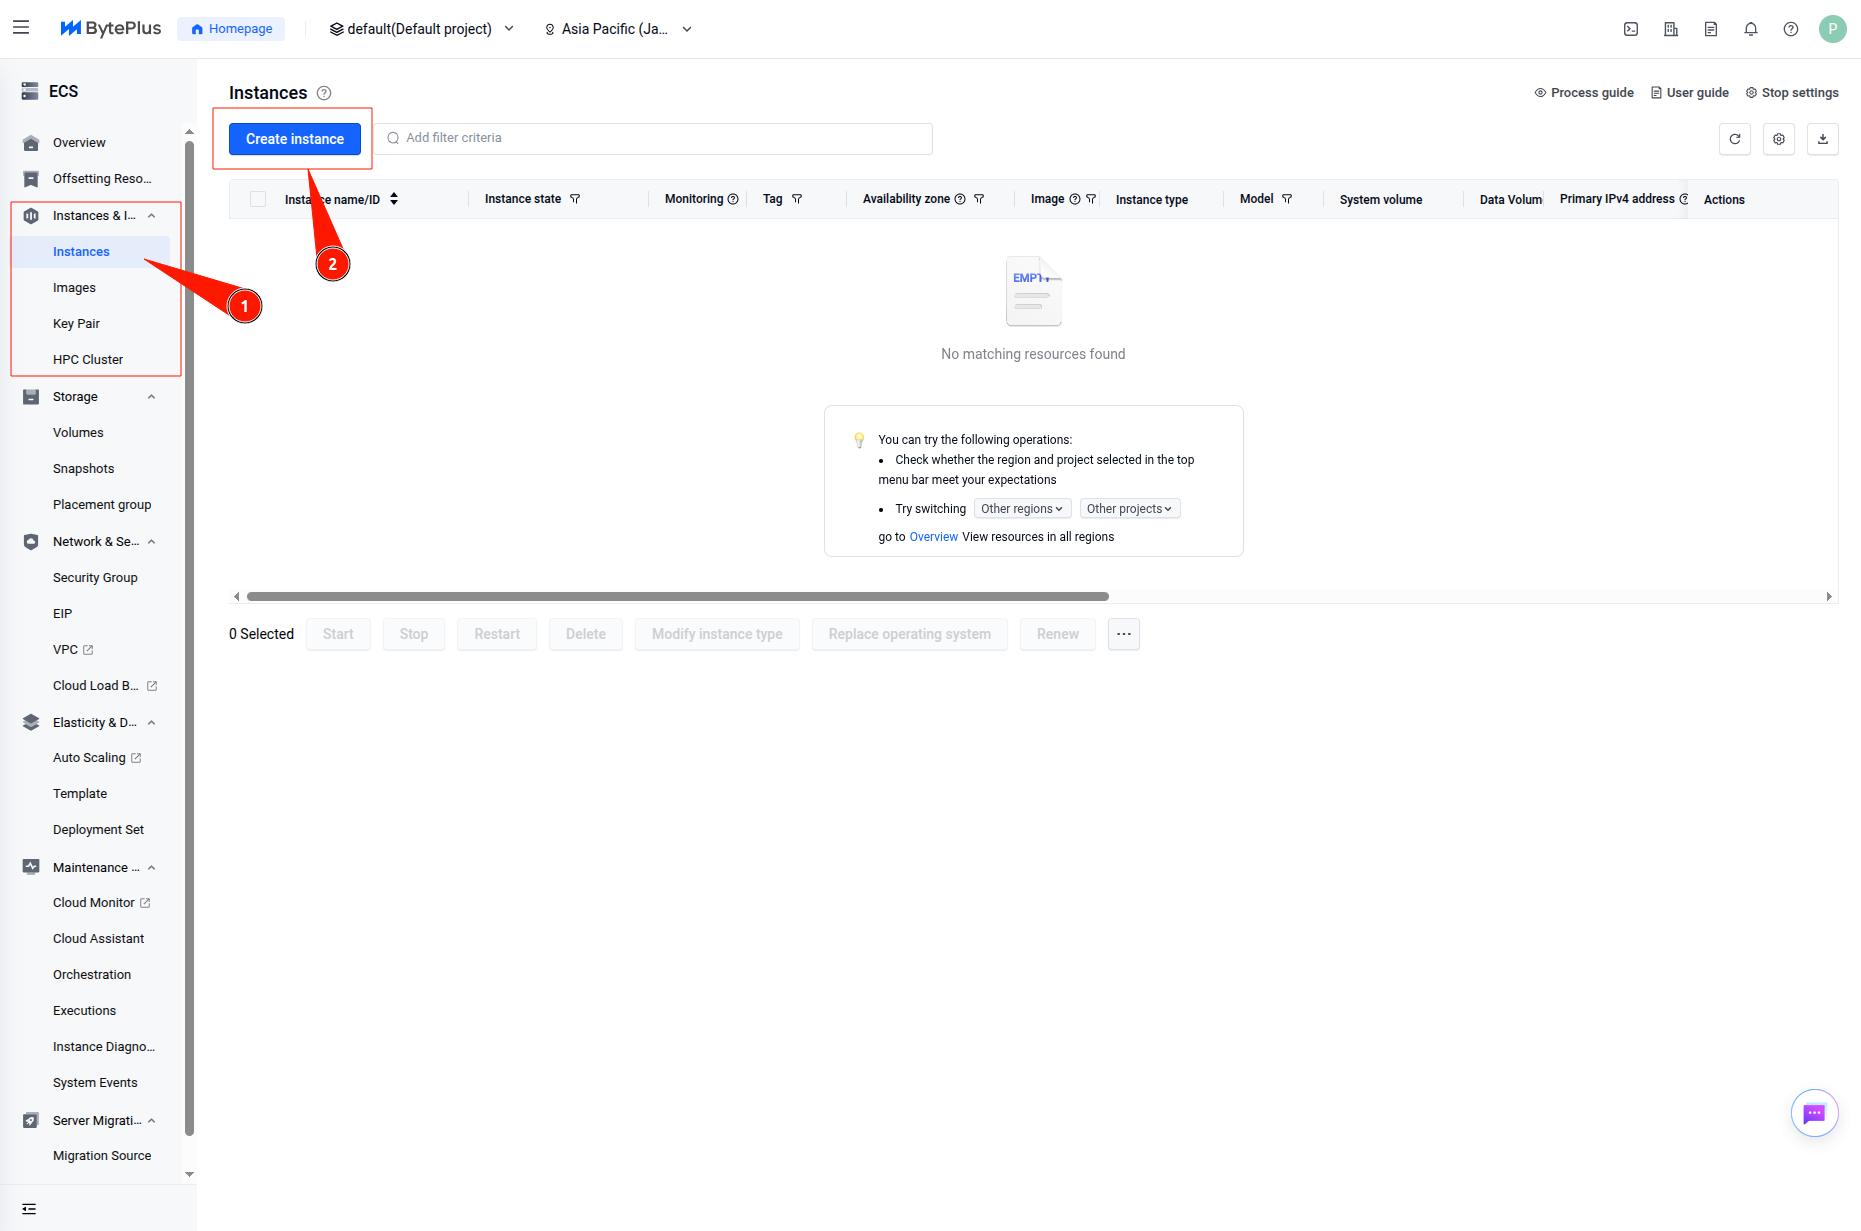 BytePlus ECS Instance Sidebar
Instance Configuration
Click on the tiny
?button for more detailed information
I will make the instance configuration as separate steps, since BytePlus has done a really nice job of explaining what certain configuration does, what they are, how they will impact the cost, etc.
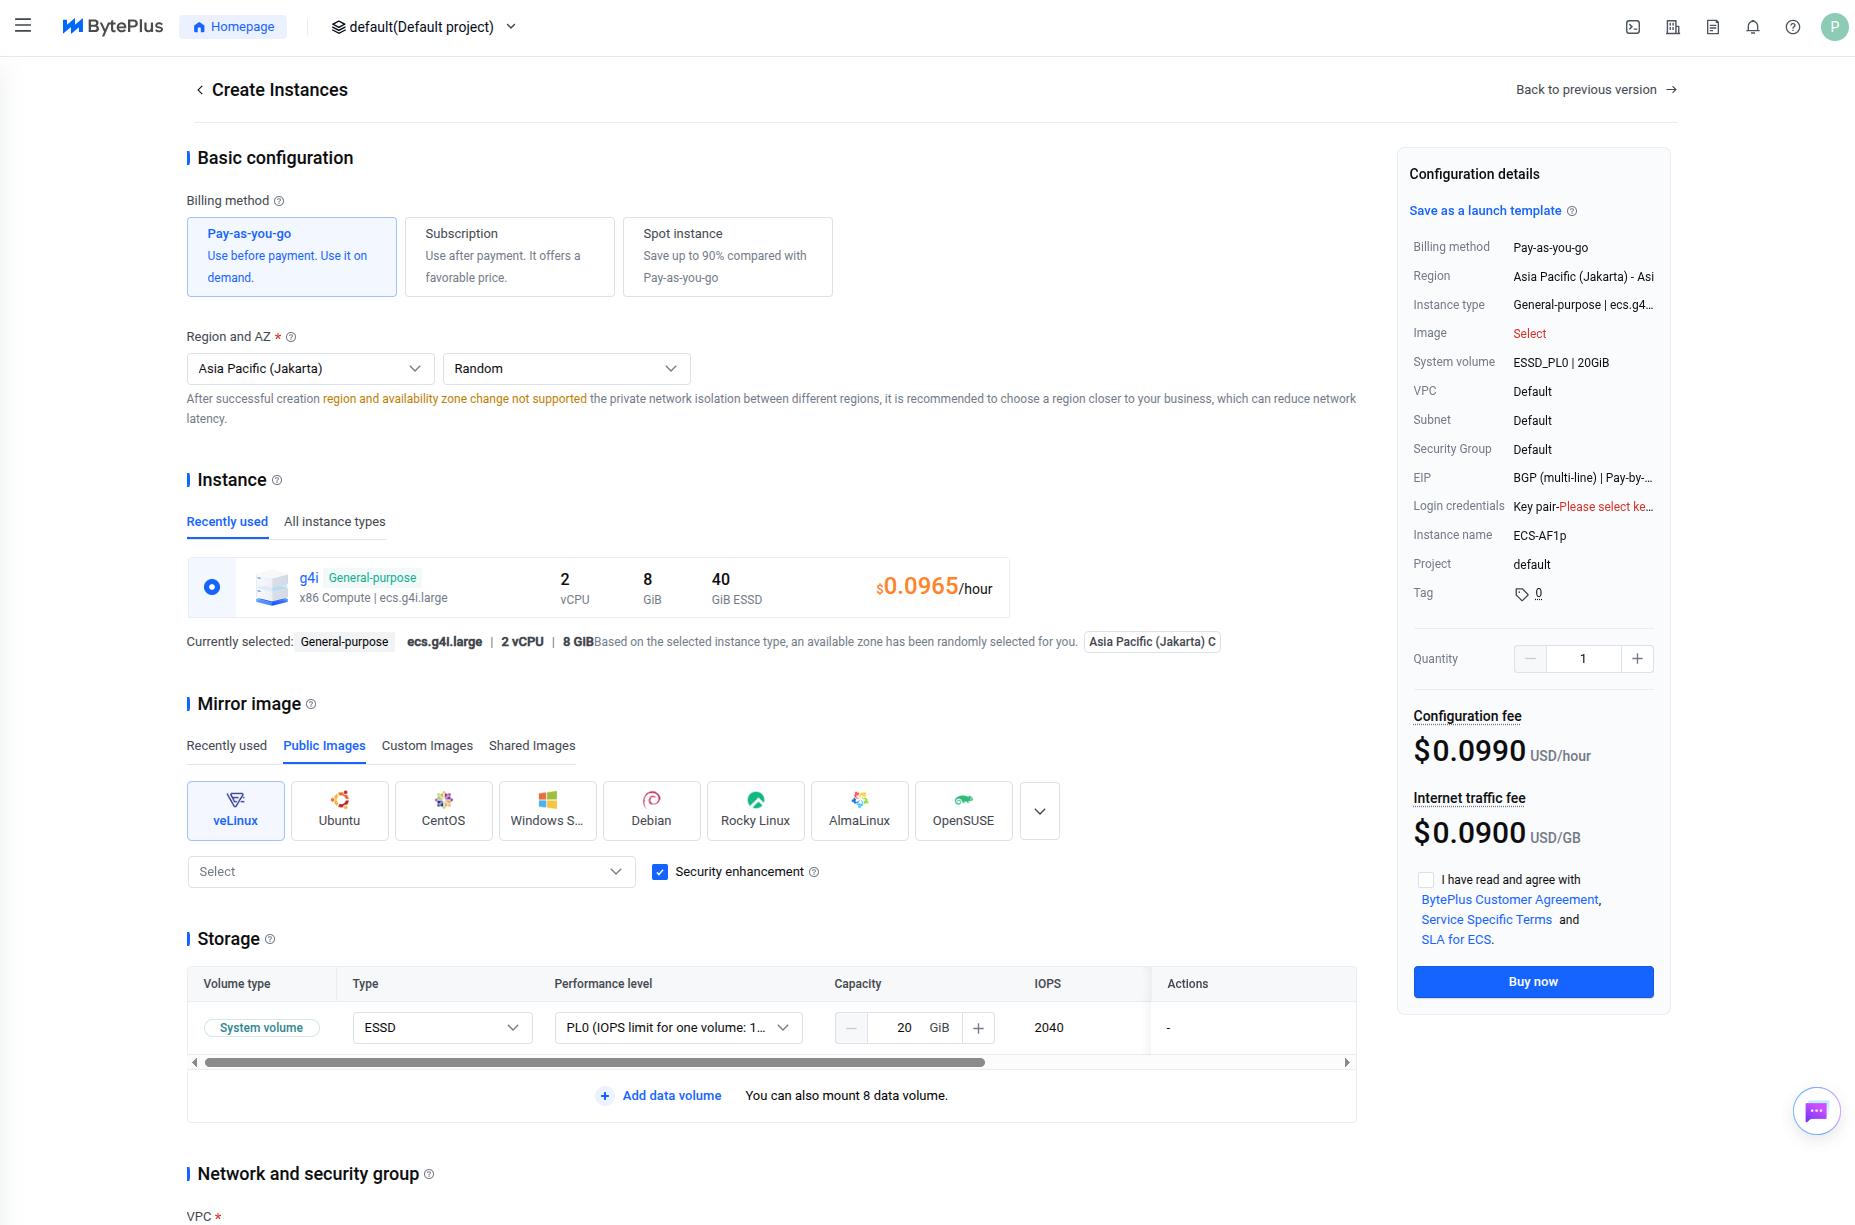 instance creation overview
1. Basic Configuration
In the basic configuration section, there are two part that you can configure, which are Billing Method and Region and AZ.
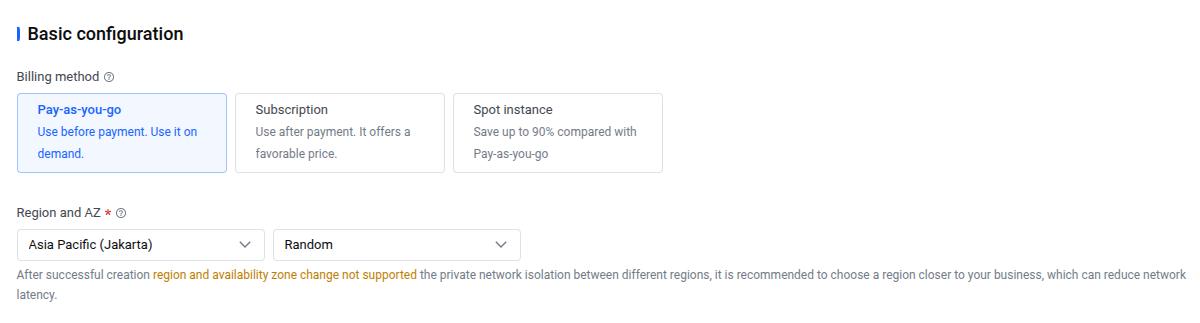 Billing Method
In the billing method part, there are 3 total options you can choose before creating your instance:
- Pay-as-you-go: Billed on the hour, and the instance is yours until you stop or delete it.
- Subscription: Billed settled by subsription term, like montly or annual.
- Spot Instance: Like pay as you go with bigger discount, but your instance can be released by BytePlus since you’re using the spare capacity with warning of course
if you want a more detailed explanation, BytePlus already made the comparison table when you click the ? button which explain it better than me.
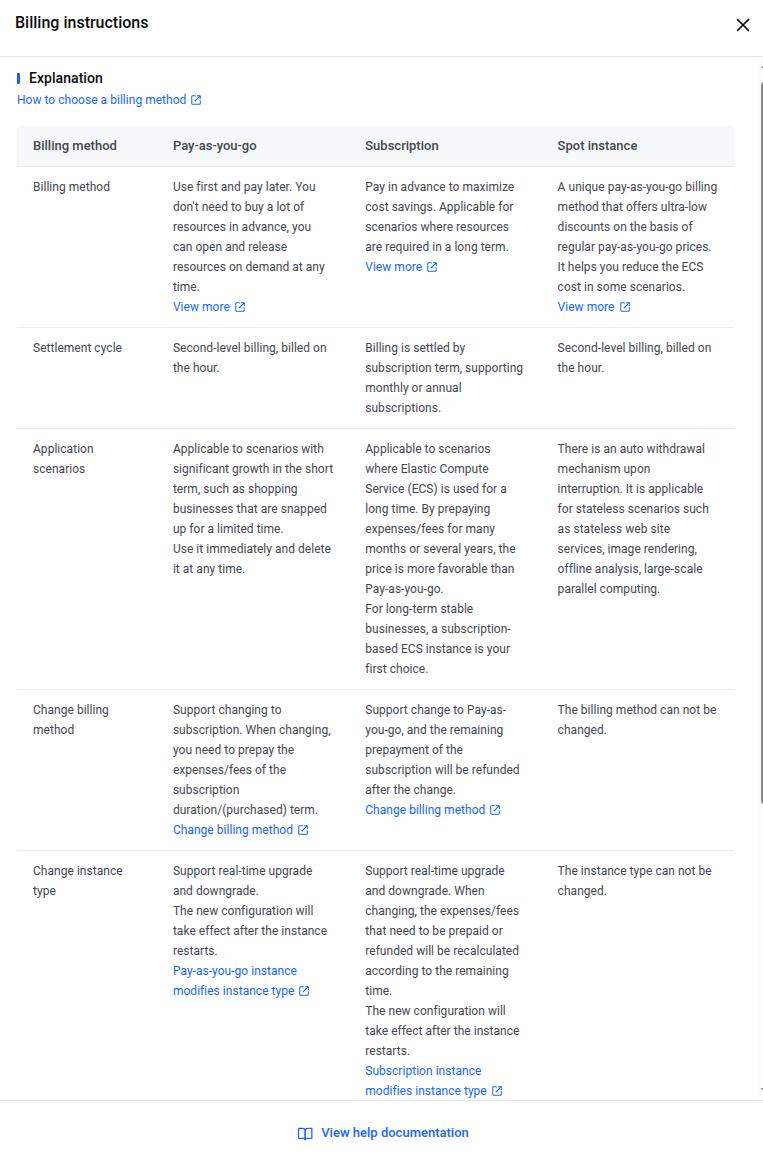 Instance Billing Method Comparison | source: BytePlus
Region and AZ
Region here is basically a geographical region where the data center is located. AZ which is short for Availability Zone refers to a physical data center. Again, if you want more detailed explanation on this check out the ? button.
For basic configuration steps, i’ll be choosing pay as you go billing method, and Asia Pasific (Jakarta) region,and Asia Pasific (Jakarta) A for the AZ
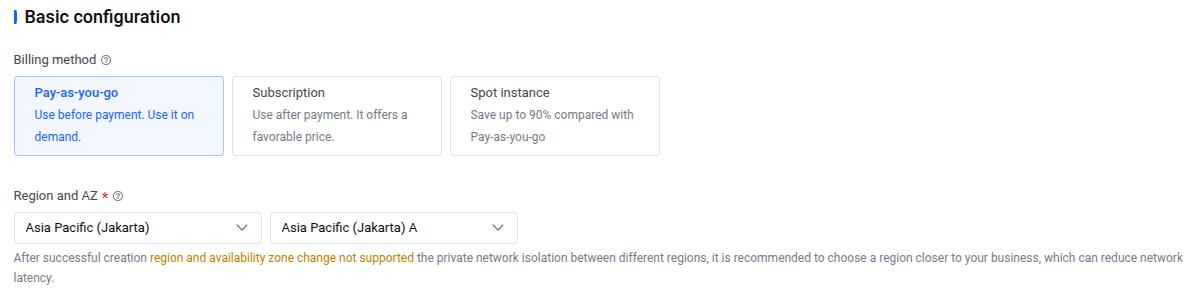 Instance Basic Configuration
2. Instance
After configuring the billing and region, we can move on to choosing your instance type, this basically choosing the specifications for your instance that best fits your services or workload that you want to run on that instance.
There are several ways that you can filter through all the available instance types, from filtering them with the total amount of vCPUs, memory, and the usage of the instance, which come with this options:
- All
- General Purpose
- Compute Optimized
- Local-SSD
- Bare Metal
- Shared
Below are the recommended instance type families for your business scenarios based on BytePlus recommendation Here
| Business Scenarion | Commonly Used Software | Recommended Instance Type Families |
|---|---|---|
| Web Service | Apache, Nginx | General Purpose, Compute Optimized, General Purpose EBM, Compute Optimized EBM |
| Middleware | RocketMQ, RabbitMQ, Kafka | General Purpose, General Purpose EBM |
| Database | MySQL,NoSQL | Memory Optimized, Local SSD |
| Cache | Redis, Memcache | Memory Optimized |
| Big Data | HDFS, MapReduce | Local SSD, Big Data |
For now i’ll be choosing the General Purpose option, and choosing the ecs.g4i for the family, and ecs.g4i.large as the instance type.
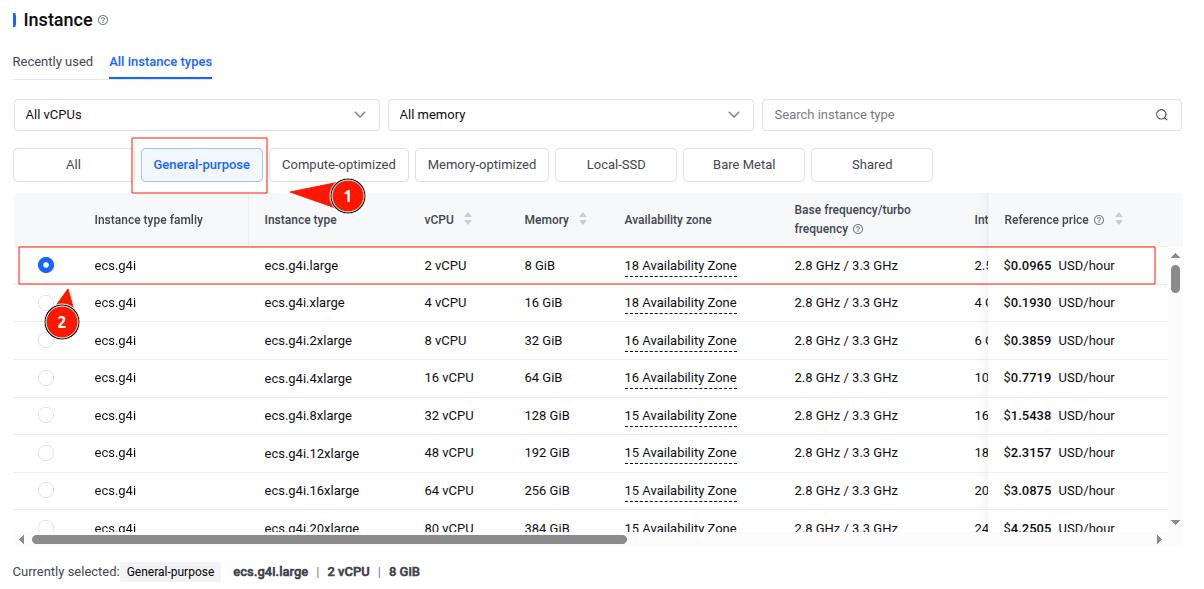 Instance Type Picker
3. Mirror Image
Now we continue with choosing Operating Systems (OS), BytePlus called this Mirror Image, basically a place where you can pick and choose images for your instances. BytePlus gives 3 options for this:
- Public Images: Images that you pick from here, are provided by BytePlus.
- Custom Images: Images comes from our own uploaded or created private images.
- Shared Images: Images that are shared by other BytePlus account.
and after picking your image, there will be a dropdown section where you can choose your image version. For now, I’ll be choosing Debian for the OS and for the version I’ll be running the Debian 12 version.
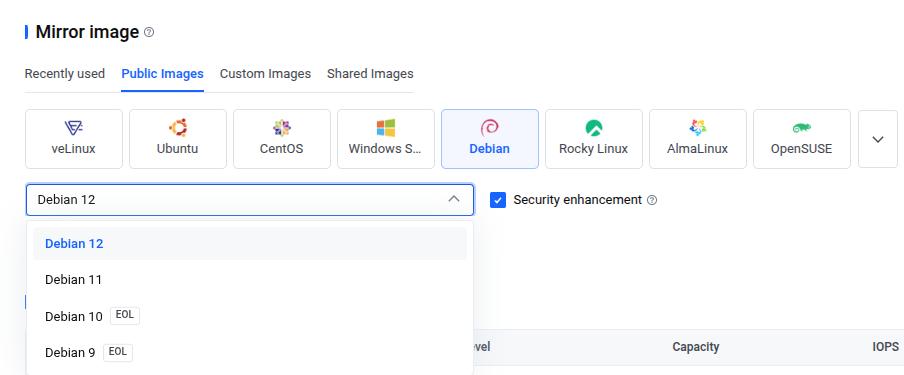 Mirror Image
4. Storage
Check the storage documentation Here
ok so after choosing the image, now we pick the storage configuration, oh yea also known as Elastic Block Storage (EBS), BytePlus gives several Storage Types and Performance level for the configurationc, and of course system volume and data volume. below are a quick introduction to it:
Volume Type
- System Volume: This type is used for storing your operating systems.
- Data Volume: This type is used to store the application data. (Note: you can mount a data volume pre or post ECS creation)
Storage Type
- ESSD FlexPL: ideal for intensive workload that require low latency
- ESSD PL0: ideal for moderate workload like small to medium size workload
- TSSD TL0: ideal for workload that need high bandwidth ant not sensitive to latency
More detailed explanation on storage type, their use cases, and their benefit Here
for this guide, I’ll be choosing for the system volume an ESSD storage type and the performance level PL0.
 Storage Configuration
5. Network and Security Group
Now we can move on to Network and security group configuration. there are a couple of things you can configure here:
- VPC: Virtual Private Cloud is an isolated virtual network environment for the resources on the cloud.
- Subnet: Subnet in cloud platform is a subdivison of an IP address range within a VPC
- Security Group: is an collection of security rules where you can use to filter traffic going in or out of the services.
Since this is a simple deploy your first ECS guide, we’ll be using just default VPC, Subnet, and Security Group for this guide.
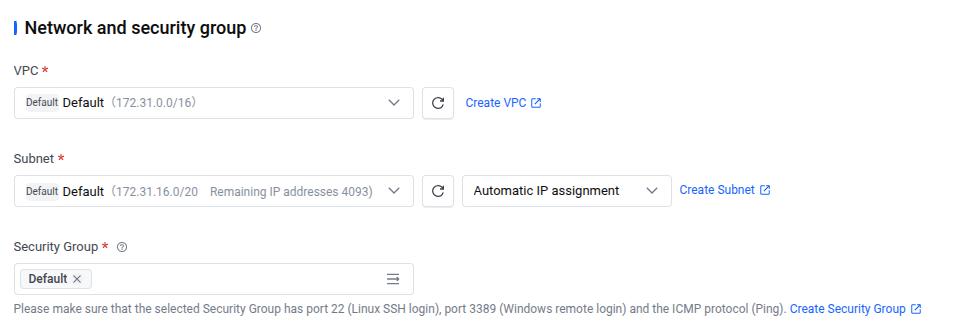 Network and Security Group
6. Public Network Access
Next is the configuration so that your instance have internet connection, the configuration that you need to choose is enabling the “Assign Elastic IP (EIP)”. and the rest is self explanatory.
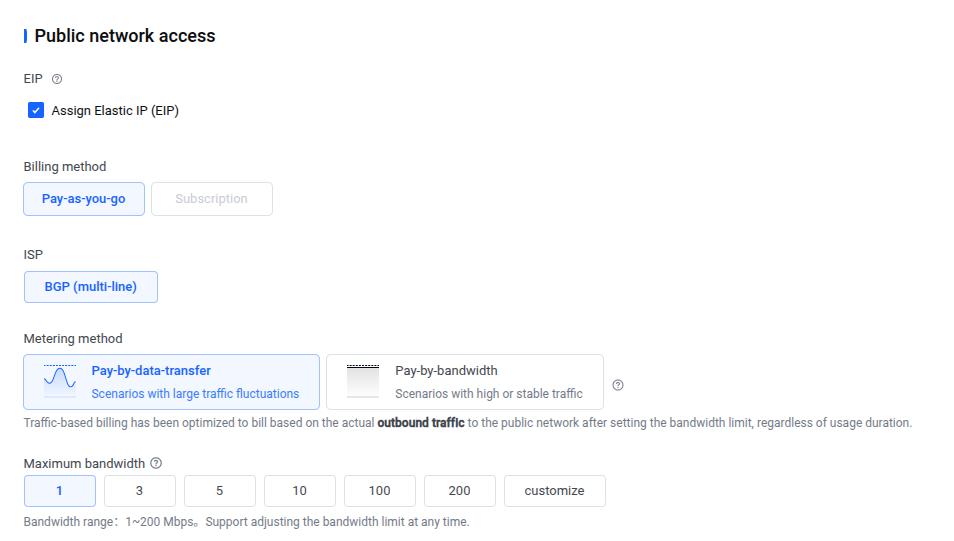 Public Network Access
7. Login Method
For Login Method, there will be 2 options that we can use for the Login Credentials:
- Password: with password, you can connect/access the ECS from the console using the inputted password
- Key Pair: with Key pair, you’ll be prompted to download the private key and store it somewhere, this will be used for connecting with SSH.
for this guide, we will use Key Pair, when choosing this options, we can either create it from this instance configuration, or create key pair before doing the instance configuration.
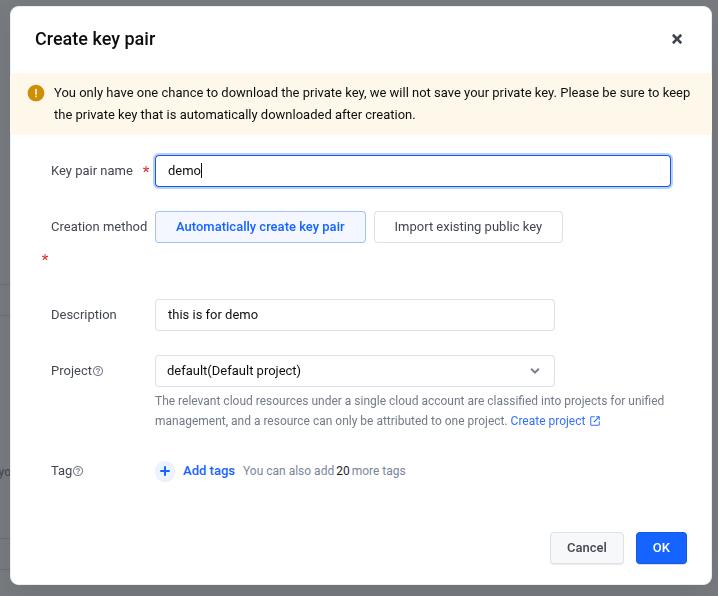 Creating Key Pair
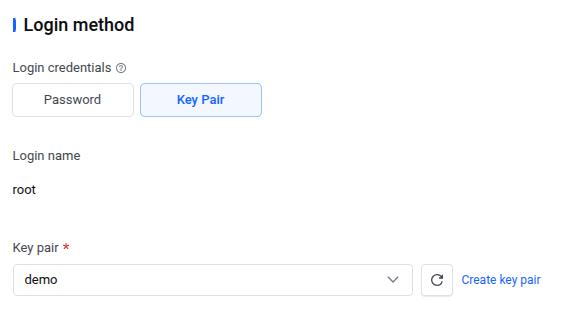 Login Method
8. Instance Configuration
Lastly, it’s Instance Configuration, in this section we can put in our instance name, hostname, and changing the project.
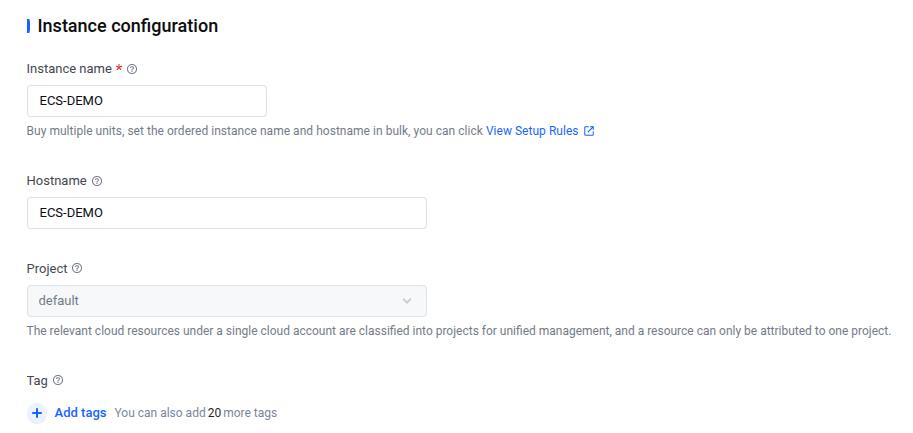 Instance Configuration
9. Deploying the Instance
After the last instance configuration, on the right side of the dashboard there will be Configuration Details where you can see all the configuration that we’ve done and the price for it. To deploy just click Buy Now.
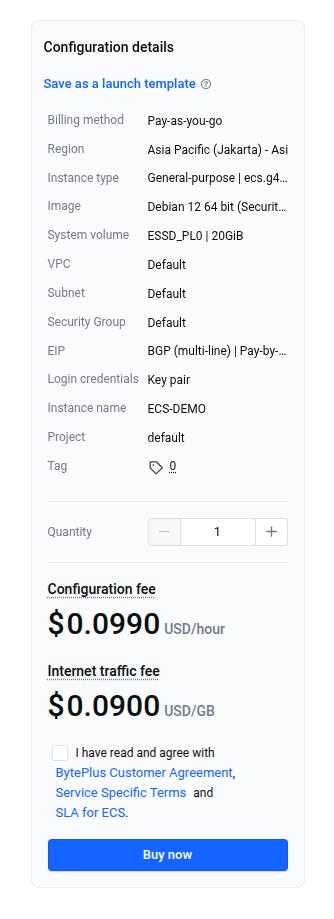 Configuration Details Overview
Post Instance Creation
With the configuration process done, you’ll be given a new page saying that the instance is submitted, and you can check it on the console.
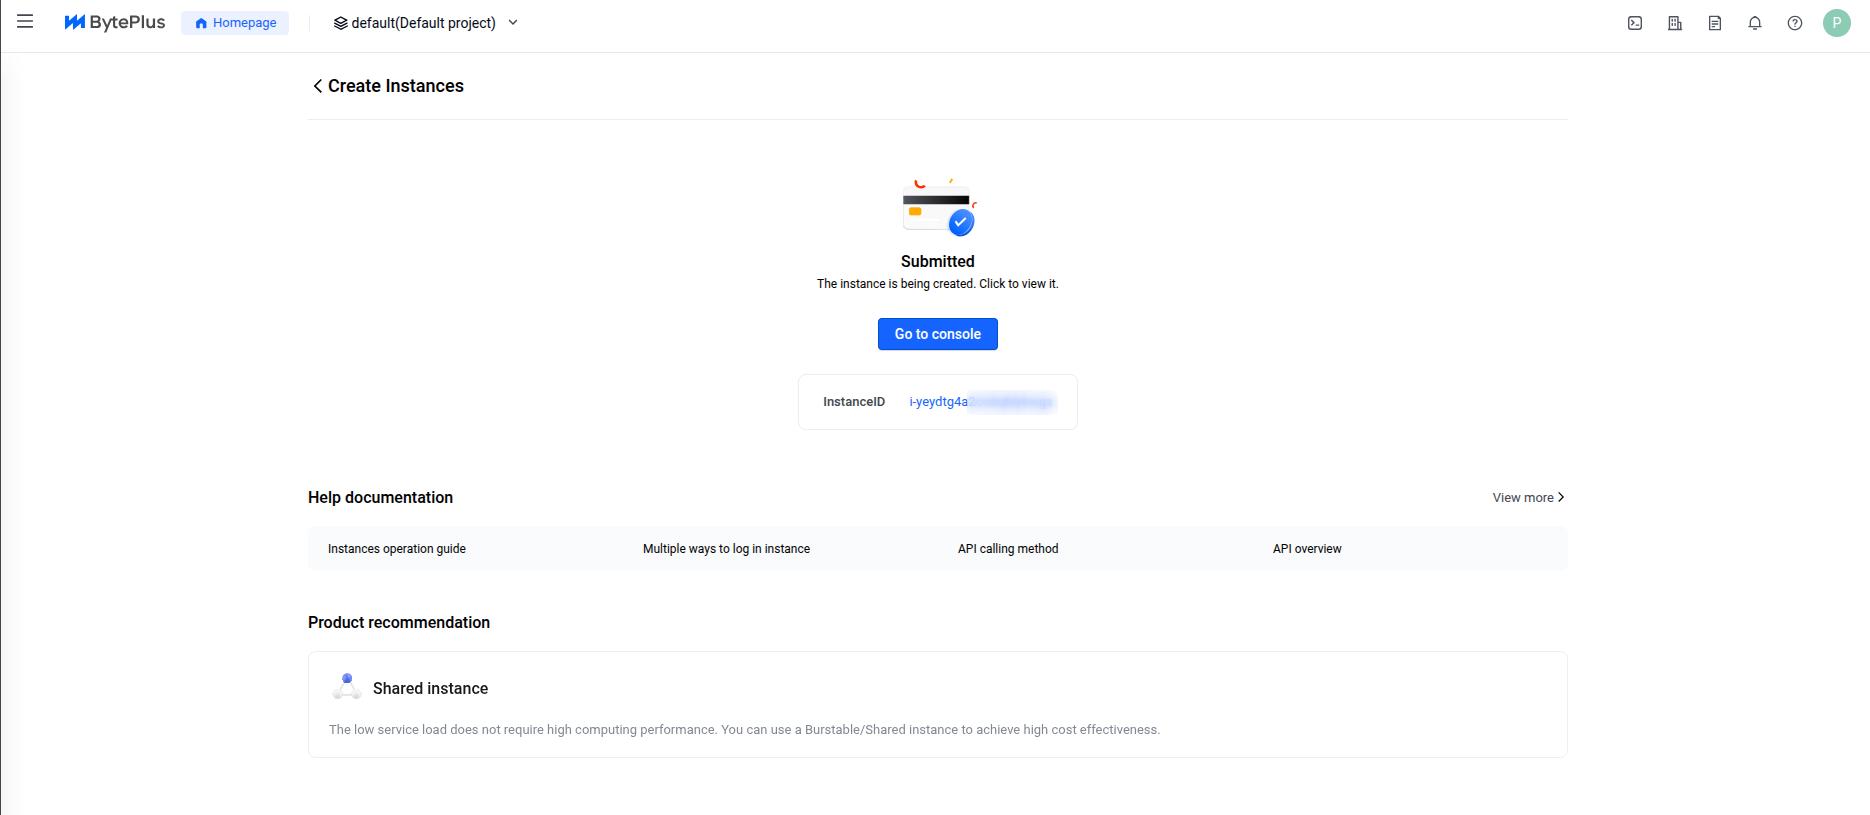 Instance Submitted Page
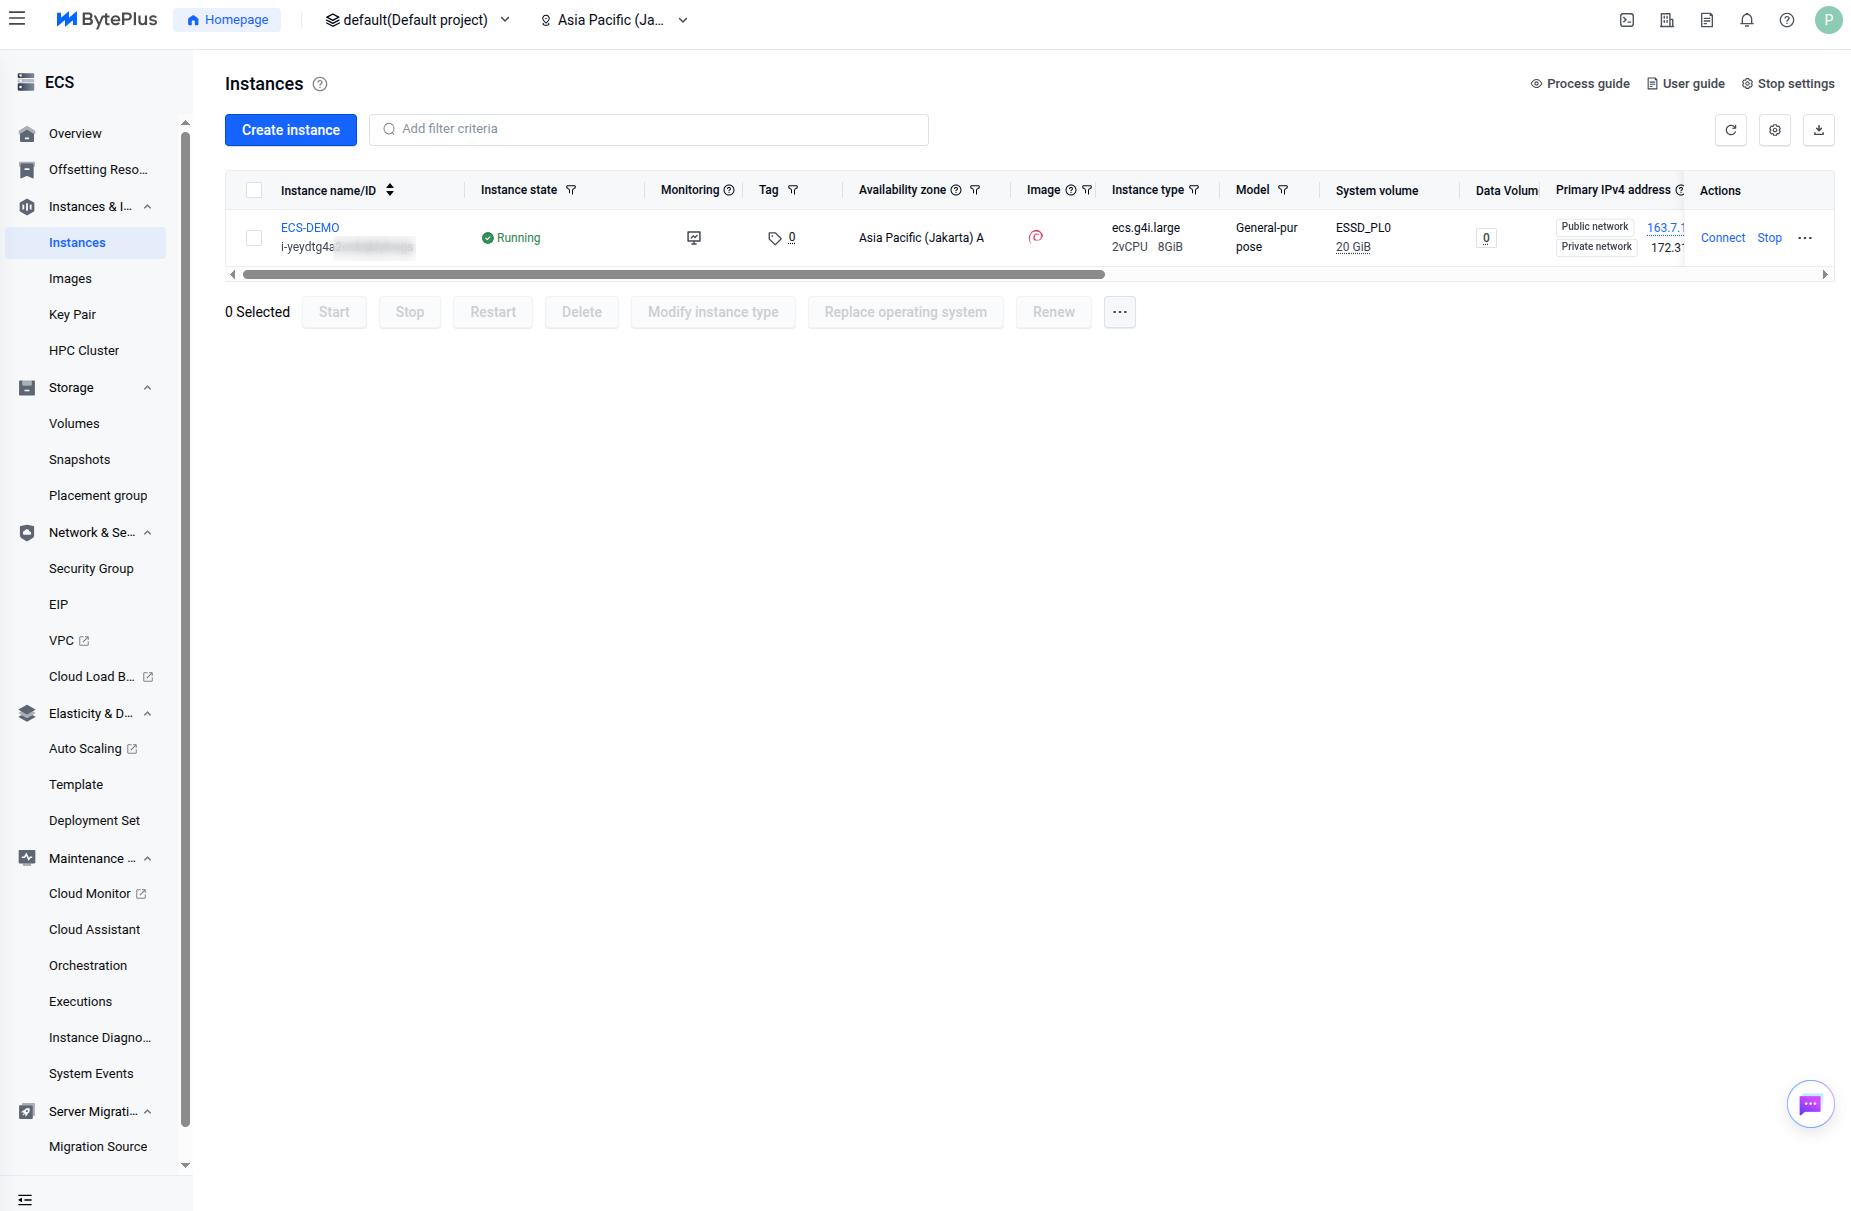 Instance Deployed
Connecting to Instance
So now after the instance is up and running, we can try accesing the instance, we gonna use ssh for this
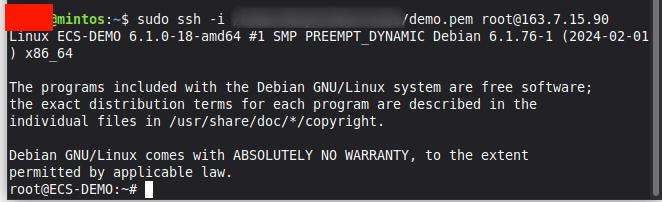 Instance SSH Connect
Finish
Ok now you’ve deployed instance on BytePlus environment, congratulations!